

So, you've been dreaming about a cosy wood-burning stove, haven't you? You've seen them in your friends' homes and admired them in glossy magazines and lifestyle websites. And now, you've finally decided to go for it and get one for yourself.
Well, congratulations on starting your wood-burning stove research in the right place – with installation. Many people get caught up in the excitement of choosing the perfect stove and overlook the importance of proper installation.
Nailing the installation will not only guarantee your stove performs at its best but also protect your home and family from potential safety hazards. A well-installed stove will comply with all the necessary regulations, so you stay on the right side of the law.
Key Highlights on Installing a Wood Burning Stove
In this detailed guide, you'll discover:
- All about wood burning stove regulations and why "Part J" might just become your new bedtime reading.
- How to master the art of chimney preparation, whether you have an existing fireplace or need to install a twin wall flue system from scratch.
- Learn when it's best to tackle the installation yourself or when it might be wise to call in the cavalry (aka professional installers).
- How to pick a model that looks great and performs brilliantly. Size, efficiency, and style—know what makes a stove perfect for your home, not just for the brochure.
- And much more!
Understanding UK Regulations for Wood Burning Stoves
Now, before we get into the exciting bits of choosing your stove and planning your installation, let's take a moment to talk about the boring (but incredibly important) stuff – regulations.
I know, I know, it's not the most thrilling topic, but trust me, if you want safe, legal, and stress-free insulation, it's something that can't be ignored.
Building Regulations for Stove Installation
Installing a wood-burning stove in the UK comes with specific building regulations that need to be paid attention to. These regulations cover everything from the positioning of your stove to the materials used in the installation. Failure to comply could result in legal issues and safety hazards, so we can't stress enough to get familiar with them before starting your installation project.
Part J of the Building Regulations (Combustion Appliances and Fuel Storage Systems)
Part J of the Building Regulations covers several aspects of wood stove installation, including:
- Minimum distances your stove should be from combustible materials, such as walls, furniture, and flooring.
- The regulations stipulate the size, thickness, and materials that should be used for the hearth (the fireproof base) upon which your stove sits.
- The requirements for the flue system, which is the chimney or pipe that carries the smoke and combustion gases out of your home.
- The document also specifies the ventilation requirements for the room in which your stove is installed.
- Part J requires the installation of a carbon monoxide detector in the same room as the wood-burning stove.
Certifications and Standards
In addition to building regulations, there are also certifications and standards that your wood-burning stove and its installation should meet.
DEFRA Certification
Required for stoves used in Smoke Control Areas. Wood burners must be DEFRA-approved, which means they pass tests for emitting smoke particles under the legal limit.
CE Marking
Indicates that the appliance meets EU safety, health, and environmental protection requirements.
HETAS Certification
The Heating Equipment Testing and Approval Scheme (HETAS) is the official body recognised by the government to approve biomass and solid fuel heating appliances, fuels, and services. This includes the registration of competent installers and servicing businesses.
Can You Install a Wood-Burning Stove Yourself?
Ah, the million-pound question – can you install a wood-burning stove yourself? Well, the short answer is yes, it's totally possible (and legal) to install a wood-burning stove on your own.
Is it the wisest choice? Let's weigh up your options.
DIY Installation vs. Professional Help
If you are a DIY enthusiast who has already tackled some larger projects, has a knack for precision, and is willing to deal with building regulation - why not? But before you don that hard hat and get to work, I suggest considering the following.
| Aspect | DIY Installation | Professional Installation |
| Cost | Lower upfront costs due to no labour fees. | Higher upfront costs. |
| Time | Flexible timing: work at your own pace. Can be slower due to the learning curve. | Installation is quick and scheduled, minimising disruption |
| Skill Level | A rewarding challenge if you’ve good DIY skills. It can be satisfying to complete the project yourself. | Benefit from professional skills and experience. |
| Safety | Safety can be managed with careful planning and adherence to guidelines. | Professionals are likely to adhere to strict safety standards. |
| Compliance | Opportunity to learn and ensure personal compliance with building regulations. | Assurance of compliance with all regulations, backed by professional accountability. |
| Equipment | Investing in the right tools can be an added benefit for future projects. | No need to worry about equipment. Professionals come fully prepared. |
Hiring a Professional Wood-Burning Stove Installer
If you've decided that installing your wood-burning stove yourself is a little out of your league, there's no shame in that. However any person with some DIY skills can easily do it themselves.
To hire the right installer, take these considerations into account.
- Look for HETAS registration - As mentioned earlier, HETAS is the official body that certifies competent installers.
- Get multiple quotes - Obtain quotes from several installers to compare prices and services, but don't just go for the cheapest option.
- Ensure proper certification - Upon completion of the installation, your installer should provide you with a certificate confirming the job's been carried out in accordance with building regulations.
Planning Your Wood Stove Installation
Now that we've covered the less exciting but extremely important regulation requirements, it's time for the fun part – planning your wood-burning stove installation. If you're stoked to get started (pun intended), let’s begin.
Assessing Your Space
When selecting a spot for your wood-burning stove, consider the following:
- Ideally, your stove should be located in a central area of the room to ensure even heat distribution.
- Make sure there's sufficient space around the stove to comply with the minimum safety clearances outlined in the Building Regulations.
- Consider how the stove will look in the room and choose a location that complements your existing décor and furniture layout.
Choosing the Right Stove
There's no end to beautiful wood-burning stoves to buy, and it's tempting to choose based solely on aesthetics. But you want your chosen wood stove not just to look great but also to perform well, so there are some things to give thought to.
- The size of your wood burner should be proportional to the size of the room it will be heating. A stove that's too small won't effectively warm the space. One that's too large will overheat the room and waste fuel.
- The heat output of a stove is measured in kilowatts (kW). As a general rule of thumb, you'll need about 1kW of heat output for every 14 cubic metres of space.
- The higher the efficiency, the less fuel you'll need to burn to achieve the desired temperature. I'd recommend stoves with an efficiency rating of at least 75%.
Recommended Brands/Models for UK Homes
You are best to do your own research when deciding on a new stove; ask around - family and friends who own wood burners are a good starting point.
Here are a few of the most popular brands, but don't just limit yourself to these:
- Charnwood
- Stovax
- Morso
- Clearview
Installation Preparations
If you've gone the DIY route - it's going to be challenging but rewarding. Your first step is to get your space prepped and gather all the necessary materials and tools.
Tools and Materials for Installing a Wood-Burning Stove
| Tool/Material | Purpose/Usage |
| Measuring Tape | For precise measurements of the space and stove placement. |
| Spirit Level | Needed so your wood stove and flue are perfectly level. |
| Drill with Masonry Bits | For drilling into brick or concrete if your installation involves securing the stove or flue to these materials. |
| Screwdrivers | Different sizes for assembling and securing different parts. |
| Adjustable Wrenches and Pliers | For tightening and adjusting nuts and bolts during the installation. |
| Saw (Hand Saw or Jigsaw) | If any structural modifications are necessary, such as cutting through wood. |
| Heat-Resistant Sealants | To seal joints so no smoke escapes. |
| Flue Pipe and Elbows | To connect the stove to the chimney or create a new flue system. |
| Hearth Materials | Non-combustible materials to construct the hearth if not already in place. |
| Safety Gear (Protective Gloves, Goggles, Dust mask) | This is self-explanatory if you want to keep safe. |
| Materials Specific to Your Installation | Such as a stainless steel chimney liner or twin wall flue system. |
Stove Placement and Clearances
Where you place your wood-burning stove is very important. It affects both safety and how well the stove distributes heat in your room.
- Maintain the minimum clearances from combustible materials as specified by the stove manufacturer and document J building regulations.
- Think about how easy it is to access your stove. You want to have enough room around it so you can use it, clean it, and maintain it without difficulty.
- Always refer to the manufacturer's guidelines, as they may vary between models. Different stoves might have different requirements, so don't assume anything.
Preparing the Room
Get your room ready and make a safe work area:
- Move furniture, rugs, and other flammable items away from where you'll be installing the stove so they don't get damaged during installation. Lay drop cloths or plastic sheets to cover the floor and any remaining furniture.
- Get your tools and materials so everything is easily accessible, reducing the need for interruptions and you are good to go.
Hearth Construction
Before you install your stove, you must prepare the base, known as the hearth, which will support the stove and catch any embers or sparks.
The hearth should extend at least 150mm beyond the sides and rear of the stove and at least 300mm in front of the stove opening.
It must be at least 12mm thick if made from non-combustible materials such as stone or concrete. For materials like glass or steel, a non-combustible substrate at least 12mm thick should be used underneath.
Plan on using durable, non-combustible materials - stone, brick, concrete, or ceramic tile.
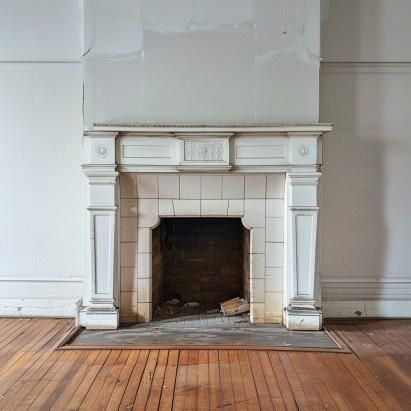
Installation with an Existing Chimney
If your home has an existing chimney, you're in luck. This can make installing your wood-burning stove a bit easier. Before you start celebrating though, you need to check your chimney is up to the task.
Inspecting and Preparing the Chimney

- Get your chimney inspected by a professional. They'll look for any cracks, blockages, or damage that could cause problems.
- Check if your chimney needs a new flue liner. Depending on its condition, lining the chimney might be necessary to ensure it’s safe for stove usage.
- Your chimney should get a good clean before starting to remove any soot, debris, or bird nests that might be blocking it.
Fitting the Wood Burner
Step 1: Position the Stove
Position your stove on the prepared hearth in line with all clearance regulations from combustible materials as specified by Part J of the Building Regulations and the stove manufacturer’s guidelines.
Use a spirit level to confirm the stove sits flat and even. Adjust as necessary using small, non-combustible shims.
Step 2: Install the Flue Pipe
Measure the distance from the top of the stove to the thimble (entry point into the chimney) to determine the length of the flue pipe needed.
If necessary, cut the flue pipe to the measured length, ensuring a clean, straight cut.
Secure the flue pipe to the stove’s flue collar using appropriate heat-resistant screws. Seal the joint between the stove and the pipe with a high-temperature sealant to prevent any smoke leaks.
Step 3: Connect to Chimney
If not already in place, install a thimble through the chimney wall. This is a pipe that allows the flue pipe from the stove to pass through the chimney safely.
Use fire cement or a similar sealant to secure and seal the flue pipe to the thimble, ensuring an airtight connection.
If using a chimney liner, connect it to the end of the flue pipe. All connections should be tight and sealed with appropriate high-temperature sealants.
Step 4: Air Intake and Ventilation
Ensure that any air intakes on the stove are clear and unobstructed.
Verify that the room’s ventilation meets the requirements outlined in Part J so there’s enough air for the stove to burn efficiently and safely.
Step 5: Final Safety Inspections
Double-check all installations for tightness, proper sealing, and alignment.
Re-confirm that all clearances around the stove from walls, furniture, and other combustible materials are within safe limits.
Installation without an Existing Chimney
If your home doesn't have an existing chimney, no worries – it isn't a barrier to installing a wood-burning stove. One popular solution is a twin wall flue system, which is a self-contained, insulated flue that can be routed through an external wall or the roof.
Step 1: Planning the Flue Route
Determine the most efficient path for the flue, ideally straight and vertical, for effective smoke extraction.
Check there are no electrical wires, pipes, or other hazards where you plan to install the flue.
Step 2: Install the Twin Wall Flue
Follow the manufacturer’s instructions to connect and secure the twin wall flue sections. Each connection should be firm and properly sealed.
Use wall brackets to securely mount the flue every 2 metres, maintaining the required clearance from any combustible materials.
Step 3: Weatherproofing
Properly seal and weatherproof the flue where it exits through the roof using flashing and storm collars to prevent leaks.
Apply high-temperature silicone or sealants at each joint for airtight connections.
Step 4: Connect to the Stove
Securely connect the flue system to the stove's flue outlet, ensuring a tight seal.
The entire flue structure should be correctly aligned and stable.
Step 5: Final Assembly and Safety Check
Check the entire installation for proper assembly, alignment, and absence of leaks.
Verify that all required clearances to combustibles are maintained.
You can find more installation guides for flue pipes here.
Post-Installation
Once you have your wood burning stove installed, simply complete a few final steps and then sit back and enjoy the comforting warmth it provides.
Initial Firing and Testing
Before you light your first real fire, conduct a test run to check everything is working as it should. This process is called "curing" and helps to remove any residual moisture or manufacturing oils from the stove.
- Start with a small, low fire using kindling and gradually increase the temperature over a few hours.
- Check for any unusual smells, sounds, or smoke coming from the stove or chimney.
- Monitor the draft to check if the smoke is properly drawn up the chimney.
- Allow the fire to burn out completely, and let the stove cool down before touching it.
Safety Features and Accessories
Carbon Monoxide Detector (Mandatory)
Installing a carbon monoxide (CO) detector is mandatory when installing a wood-burning stove in the UK. Place the detector about 5 feet below the ceiling, 10 feet from a wall, and between 3 and 10 feet from your wood stove for the best protection.
Fire Guards and Screens
Consider installing a fire guard or screen around your wood stove if you have young children or curious pets.
Stove Thermometer
A stove thermometer helps you monitor your stove's temperature and burn rate, ensuring efficient and safe operation. Attach the thermometer to the stove pipe, around 18 inches above the stove. If your stove has a built-in thermometer location, follow the manufacturer's placement instructions.
Inspection and Certification
If you hired a professional installer, they should be HETAS registered. Upon completion of the installation, your HETAS-registered installer will issue a Certificate of Compliance.
This certificate confirms that the work has been carried out in accordance with building regulations and safety standards. Keep this certificate safe, as it may be required for home insurance purposes or when selling your property.
If you installed the wood stove yourself, your work must be inspected by your local council's Building Control Department. Be prepared to make any necessary adjustments or repairs based on their recommendations.
Maintenance and Upkeep of Wood Stoves
The final piece of the puzzle is keeping your wood-burning stove in tip-top shape so it can keep you toasty for years to come. Just like any other appliance, your stove needs a bit of TLC to stay in good working order.
Here are a couple of simple maintenance tasks that will help your stove burn brightly:
Regular Cleaning and Ash Removal
Scoop out the ashes from your stove regularly, ideally after each use once they've cooled down. A buildup of ashes can affect your stove's performance. Use a soft brush or vacuum cleaner to remove any dust or debris from the stove's interior and exterior surfaces. Clean the glass door with a damp cloth or stove glass cleaner for a clear view of the fire.
Annual check-up
Book a professional chimney sweep to give your stove and chimney a thorough check-up at least once a year, preferably before the start of the heating season. They'll clean and inspect your stove, flue, and chimney, ensuring everything is in good working order and free from blockages or damage.
Wrapping Up
So there you have everything you need to know about installing a wood-burning stove, from regulation to maintaining it.
So now it's time to get started!
If you’re setting up a new flue system or upgrading your existing chimney, Flue Pipes is here to help.
We offer a wide selection of high-quality flue pipes, chimney liners, and essential accessories to ensure your wood-burning stove installation goes smoothly.
Purchase today for speedy, free next-day delivery and confidently complete your wood-burning stove installation.
Got questions?
Contact us Here for phone, email or chat support
